Sequencers
Trackview Mixer
Notation Piano Roll
Event
Editor GM List
Drum List
Computer/Keyboard Setup
MIDI Keyboard
Computer/Music
Keyboard Setup


When it comes to attaching a single
music keyboard (assuming it has at least MIDI out--see Fig 1) to a computer (PC) there are a number of options:
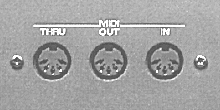
Fig. 1
A) Choice of music keyboards
The auto-accompaniment
style keyboard is probably the best for all round usability.
Depending on it's
specifications, it should be loud enough(eg.15 watts) to be heard in an average sized
classroom and therefore be useful to accompany singing or drama. If it has the GM
specification it will have it's 128 sounds (patches) to play around with.
The
auto-accompaniment facility means that not only can different styles of music be
applied to live situations but when composing and/or recording onto a computer music
sequencer, these styles can supply a "quick fix" arrangement as distinct from
laying down one sound-track at a time. Click on the styles below to get an idea of what can
be heard on some of the Roland keyboards. Each style may also have one or two variations
for inserting into a bridge or chorus. I've included these in the examples below as well as
some endings.
8Beat Big Band Bluegrass Boogie Bossa Nova Country Polka Salsa Samba Charleston
An excellent facility to have on this type of keyboard is a
USB input.This means that everything played on the keyboard may be saved to
a USB pen and even
transferred across to the computer sequencer for further editing. It also means that MIDI
files on a USB pen can be played on the keyboard without having to access a
computer. So this type of keyboard can be used in any given music situation within a school
or teaching situation.
The
controller keyboard is a keyboard without it's own sound source. Unlike
the keyboard referred to above which has it's own sound card, the controller keyboard (see the MIDI
keyboard page) must attach to a sound source
ie. a computer's sound card, an external sound module, another music keyboard
etc. This
type of keyboard( Fig 2
- Roland's PC-160) requires only a MIDI out socket (see Fig 1) as the MIDI cable comes out of this keyboard and into the sound
source. These keyboards are generally less expensive than those with a sound card and
because of their function, can very quickly teach the learner about MIDI. On this type of
keyboard, after having connected it up successfully to it's sound source, the user must
indicate which channel (remember there are 16 channels and Ch.10 is the drum channel) is to
be used and what sound or patch will play on that channel. So prior to playing the user
must press a sequence of buttons and keys to access the particular sound
required. It is
always an advantage to have an LED display window to let you know for example what Channel
you are using, what sound or patch you are playing, volume and panning levels
etc. Some
controller keyboards don't have an LED display and so are risky for beginners. The multi-keyboard
page will demonstrate how each of 5 controller
keyboards can play a different sound on the master keyboards sound card to produce the
final combined result. The keyboard shown below (Fig
2) demonstrates how Chord fingerings can be
colour coded and using something like electrical tape, information can
be written on the tape and stuck anywhere around the keyboard.
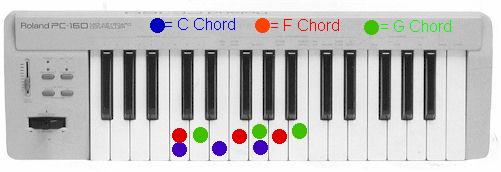
Fig 2
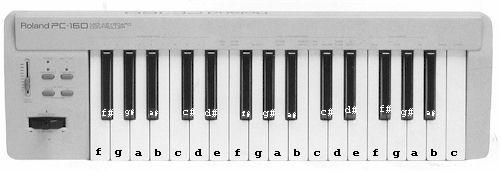
Fig 3
The PC-160 in Fig
3 also shows how the notes can be written
or stenciled on for the convenience of the students. Relevant MIDI information
can be added in this way. It is also a good idea to laminate much used sheet
music, information sheets and task pages. They certainly last longer this way.
Other Keyboards
Most other styles of keyboard, synthesizers, piano keyboards, dance keyboards etc. should
remain in the realm of the specialist and are better ignored by the beginner.
B) Choice of sound sources
Keyboards.
Any keyboard with an in-built sound card which produces realistic sounds and has a
"MIDI in" socket makes an excellent sound source especially in a teaching
situation where there are a number of controller keyboards accessing it's sound
card. This
keyboard may be used by the teacher as the master keyboard for demonstration
purposes. This setup though does not permit the user much flexibility in terms of recording
or editing what has been played unless the master keyboard has an onboard sequencer. Of
course a computer can be introduced into the setup.
So you can have one keyboard accessing another keyboard's sound card
using simply a MIDI cable (Fig 2) out of one into the other.
(Fig 2)
Soundcards.
Different soundcard makers, like different musical instrument makers, may be strong
in the production of certain sounds and weak in others. So if you want good piano sounds or
good guitar sounds or good brass sounds search around for recommendations in magazines,
websites etc. for the soundcard that produces them. The keyboard to be attached to the
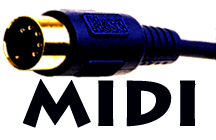
soundcard may be done so with a special MIDI cable (Fig
3) which attaches to the soundcards MIDI port and then
to the keyboards MIDI port. The connecting cable
(Fig 4)
is a cable that attaches to the USB port of a computer and to the MIDI
OUT and/or MIDI IN of the music keyboard .
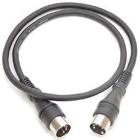
(Fig 3)
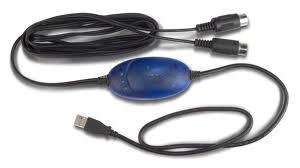
(Fig 4)
Virtual Sound Cards
As someone who has installed Roland's "Virtual Sound
Canvas" (see picture below) into a laptop, I find it to be the perfect answer for
playing back MIDI files. The one drawback occurs when you attach a keyboard to the laptop
and play the "VSC's" sounds. Because the sounds are actually installed on the
hard disk and not on a sound card, there is a clear time lapse between the striking of the
key and the sound of the note. The way around this is to use the computers sound card when
playing a keyboard (esp. for recording) and use the "VSC's" sounds on playback. It is
quite easy to swop around from one sound source to another provided they
have been installed by using the MIDI port setup section in
the sequencer you're using. This is an excellent
solution to upgrading a soundcard for those who don't want to open up their computer or
laptop. The version in my laptop contains over 1000 sounds. With this setup I can take my
laptop anywhere, hitch it's headphone socket into a PA system and play back my MIDI files
via the "Virtual Sound Canvas" (Fig 4) while reading the song words on the notepad page of my sequencer ("Digital
Orchestrator Plus") and accompanying myself on
guitar. Simple when you know how!
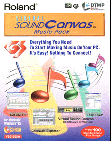
(Fig 4)
Sequencers
Trackview Mixer
Notation Piano Roll
Event
Editor GM List
Drum List
Computer/Keyboard Setup
MIDI Keyboard
